Code management
The pages within a digital offering can be grouped by the provider according to various aspects ("categories" or "categories" and "features", see below for details). This is done by means of so-called "codes".
A code is a string of characters (with certain restrictions) that can be freely selected by the provider of the digital offering and is stored in the SZM tag 2.0 (Javascript code to be stored in the website that triggers the measurement impulses for this page, for details see INFOnline Integration Guides). It is used to identify the tagged web pages and is the basis for subsequent category/feature assignment in the Customer Center according to the Cat 2.0 category model. When the page count is evaluated, the codes are recorded and totaled by the system. This allows the aggregation of page impressions and visits on e.g. thematically related websites.
IVW's Kat 2.0 category model is used to categorize stationary websites, mobile-enabled websites ("meWs") and apps. With Kat 2.0, website content can in future be categorized not only in terms of its topic and creator, but also in numerous other dimensions. This is made possible by the new structure, which distinguishes between categories and their characteristics.
As things stand, the following eight categories are available:
In Code Management, you make the code assignment to the eight categories and their characteristics.
- Format
- Language
- Producer
- Homepage
- Delivery
- app
- Paid Content / Service
- Content
Each category is available in different forms, the so-called characteristics. These can be used to specify the properties and content of an online offering.
Code Status
In the Customer Center's code management, codes are differentiated according to the following statuses:
**Active codes.
Active codes are codes that have had a page impression within the last 90 days.
Inactive codes:
All codes that are permanently blocked, deleted or have no page impression within the last 90 days are considered inactive codes.
Permanently blocked codes:
Using the "Block Code(s) Permanently" function, codes can be blocked permanently in Code Management. The assignment of these codes is removed, and the codes are no longer displayed in the Code Management module. If a permanently blocked code accumulates page impressions, these are included in the measurement as unassigned, even if they are no longer displayed in the Code Management module. It is therefore recommended that you only use the "Block code(s) permanently" function if you are sure that the codes will no longer occur in the future.
Deleted codes:
The "Delete code(s)" function can be used to delete codes in code management. The assignment of these codes is cancelled, the codes are given the status "Deleted" and continue to be displayed in the Code Management module. If page impressions are received again for these deleted codes, they are included in the measurement as unassigned. The status of the code changes from "Deleted" to "Unassigned", and the code can be reassigned in the Code Management module.
Code Management: Undo, Save and Log
**Undo
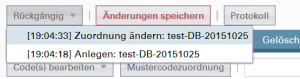
With the button "Undo" single steps can be undone. Multiple actions (e.g. assigning multiple codes to one feature in one action as multiple selection) are considered as one action. Please note that all changes made during a session (without saving) are discarded only after closing the Customer Center.
Save changes
By pressing the "Save" button, all changes made up to this point will be saved in the module. Please note that when exiting the module, it is absolutely necessary to save the changes made - otherwise they will be discarded.
**Log

The "Log" button opens a window in which all changes made since the last save or since the start of the current session are logged.
You can save the changes using the "Copy&Paste" function or by copying them to the clipboard.
Editing the codes
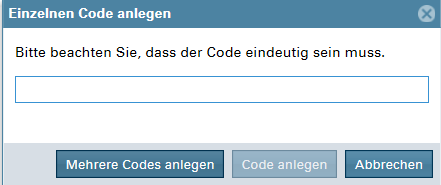
**Create new code
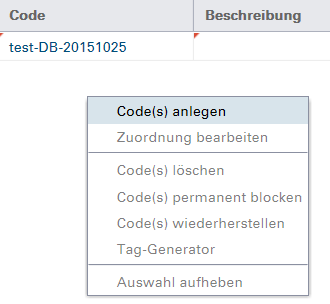
This function can be reached on the one hand via the button "Edit code(s)" and on the other hand via the context menu (right mouse button -> Create code(s)). Alternatively, a single code or (via the button "Create multiple codes") a list of codes can be created. After assigning the code name, which must comply with the code guidelines, it is possible to directly assign the new code(s) and assign a description. Please note that the name of the code cannot be changed afterwards.
A newly created code is marked with a red corner in the code table, indicating that it has not yet been saved. When creating several codes, however, these are directly transferred to the database - even without explicit saving.
Codes with the name: "PUSH_Codename "
Important notes on the implementation of the newsletter pixel
Please note that newsletter pixels are displayed in code management as well as IDAS as "PUSH_Codename". It is mandatory to assign newsletter codes to code management as well.
Sample code assignment
Define a sample code assignment once. After that you can quickly and easily assign new code according to this assignment.
Code assignment and description
Assigning a code according to the category model 2.0 is done by clicking the button "Edit code(s)" and selecting "Edit code(s)" or by double-clicking the code. In the layer that opens, you can optionally create or change a description for the code on the one hand, and on the other hand you can assign the selected code to the eight predefined categories or their characteristics in this layer. In each category ONE characteristic is assigned to the code. A multiple selection of characteristics as well as not selecting a characteristic in a category is NOT possible.
Assign multiple codes at the same time.
If you first select several codes with Shift and the right mouse button, you have the possibility to assign these codes simultaneously to uniform characteristics in the eight categories. If some of the selected codes were already assigned before, characteristics differing from each other will be displayed in italics in the assignment layer. If you select a new feature in such a case, the codes will all be assigned to it uniformly.
**Delete code
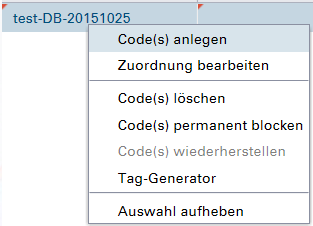
This function can also be accessed via the "Edit code(s)" button and via the context menu (right mouse button). The code gets the status "deleted" and can be found in the corresponding tab. When this change is saved, the assignment of the code is lost, so that if it occurs again, it will reappear in the overview as a "new" unassigned code and will have to be reassigned.
Restore code
This function allows you to restore codes that have been deleted.
Code permanently blocked
You also have the option to permanently remove old codes that are no longer used from the overview using the "Edit Code(s)" button with the "Block Code Permanently" function. Please note that permanently blocked codes will continue to enter the measurement as unassigned when they reappear, even if they do not show up in the code management. We therefore recommend that you only use the "Block codes permanently" function if you are sure that the code will not occur again.
If you wish to restore a permanently blocked code, please contact our Service & Support team using the contact options known to you.
Display options of the codes
Different overviews of the codes.
By default, the "All codes" tab is displayed in the code management. Furthermore, the codes are displayed in the different tabs "Assigned", "Unassigned" and "Deleted" filtered by their status.
Show and hide columns.
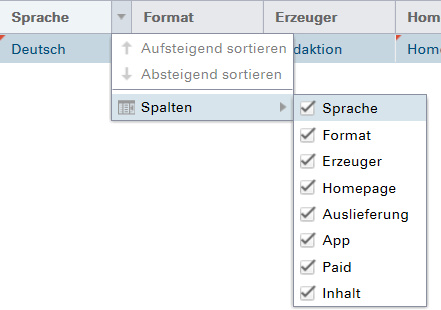
It is possible to show or hide the following columns in the code management overview:
- Description
- Status
- First access
- Last access
- Categories (here it is possible to select the eight categories)
This selection of columns is directly implemented in all tabs.
The columns can be displayed differently by the sorting function.
Code search by name
By entering a search term in the "Search" field, all codes are searched for the desired name and the matching codes are displayed. It is also possible to search for character strings within the codes. The search filtering is retained even if the display tabs are changed and can be combined with the code search by characteristics. The entire filtering can be reset at any time with the "Cancel search" button. If only the filtering of the name search is to be cancelled, the search window can be cleared with the "X" and the search thus reset.
Code search by characteristics
The button "Code search by characteristics" opens a search layer with the available categories and characteristics. Here you can now select characteristics to be searched for. After selecting the desired characteristics, start the search for the associated codes with the "Search codes" button. The "Cancel" button can be used to abort the search without any results. When searching for codes by characteristics, it is also possible to make multiple selections of characteristics per category. In addition, it is not necessary to make a selection in each category here.
The search filtering is retained even when the display tabs are changed and can be combined with the code search by name. The entire filtering can be reset at any time with the "Cancel search" button. If only the filtering of the feature search is to be cancelled, the layer can be called up again, the selection made can be cancelled with the corresponding button and the search can be confirmed again ("empty search").

Code import and export
To perform a code import, first export the KAT 2.0 structure using the "Code export" menu button. Then click the button in the code management to KAT 2.0 "Code-Import", a new window will open. With an editor of your choice you can assign your codes to the category model 2.0 according to the guidelines of the IVW and upload them to your online offer via the code import.
Please note that your editor does not remove leading zeros in a pure sequence of digits (MS Excel removes the leading 0 when opening). Otherwise, this will generate errors during import due to duplicate codes caused by omitting the leading 0.
For detailed help on code import and export, please refer to the documentation Code Import and Export (PDF).